Back in 2011 I started developing mobile applications. Being a Java developer it made sense to develop for the Android platform rather than iOS which required Objective-C knowledge, something I didn’t have, or one of the other platforms which required their own programming technologies.
There is nothing wrong with being a Java developer working on Android applications because it is trivial to apply your Java skills in that direction. However, Android only makes up a small percentage of the devices currently on the market. By only supporting Android, you would be excluding a huge audience from enjoying your mobile application.
So what are some problems and solutions associated with mobile development as an Android developer or organization?
An Expensive and Slow Approach to Mobile Development
As previously mentioned, building only Android applications excludes a lot of people from using your application, but remedying this problem is not so simple.
Building an application for Android, or for any platform, takes time. A good developer will always be interested in learning something new, so while you could possess both Android and iOS skills, it will take time to build an application for both platforms. For an organization who may not have time to wait, the alternative solution would be to hire an Android team and an iOS team, something that could become very expensive. This is from the perspective that software engineers are not cheap and neither is maintaining two different codesets for a single application.
This is where modern cross platform frameworks come into play, something that didn’t exist when mobile development had first started.
One Codebase, Two Platforms, and Affordable Development with NativeScript
Imagine a world where you could develop mobile applications for Android and iOS that share a single set of code.
Cross-platform frameworks like NativeScript, React Native, and Xamarin, have been around for a few years, but only recently have they become an acceptable solution for mobile development.
NativeScript, React Native, and Xamarin will all get you a native mobile application comparable to what was created with Java, but each using a different programming technology. NativeScript development thrives on the popular Angular framework, React Native uses ReactJS, and Xamarin uses C#.
I went the Angular route because TypeScript, what Angular uses, reminded me a lot of developing with Java.
We’re going to see how to take a more efficient stab at developing mobile applications that work for both Android and iOS using NativeScript and the very popular, Angular framework.
Developing Mobile Applications with Android and Java
If you’ve made it this far, you’re an Android developer or have knowledge of the development of Android applications. The goal here is not to learn Android, but come up with an example that can be translated directly to NativeScript for both Android and iOS support.

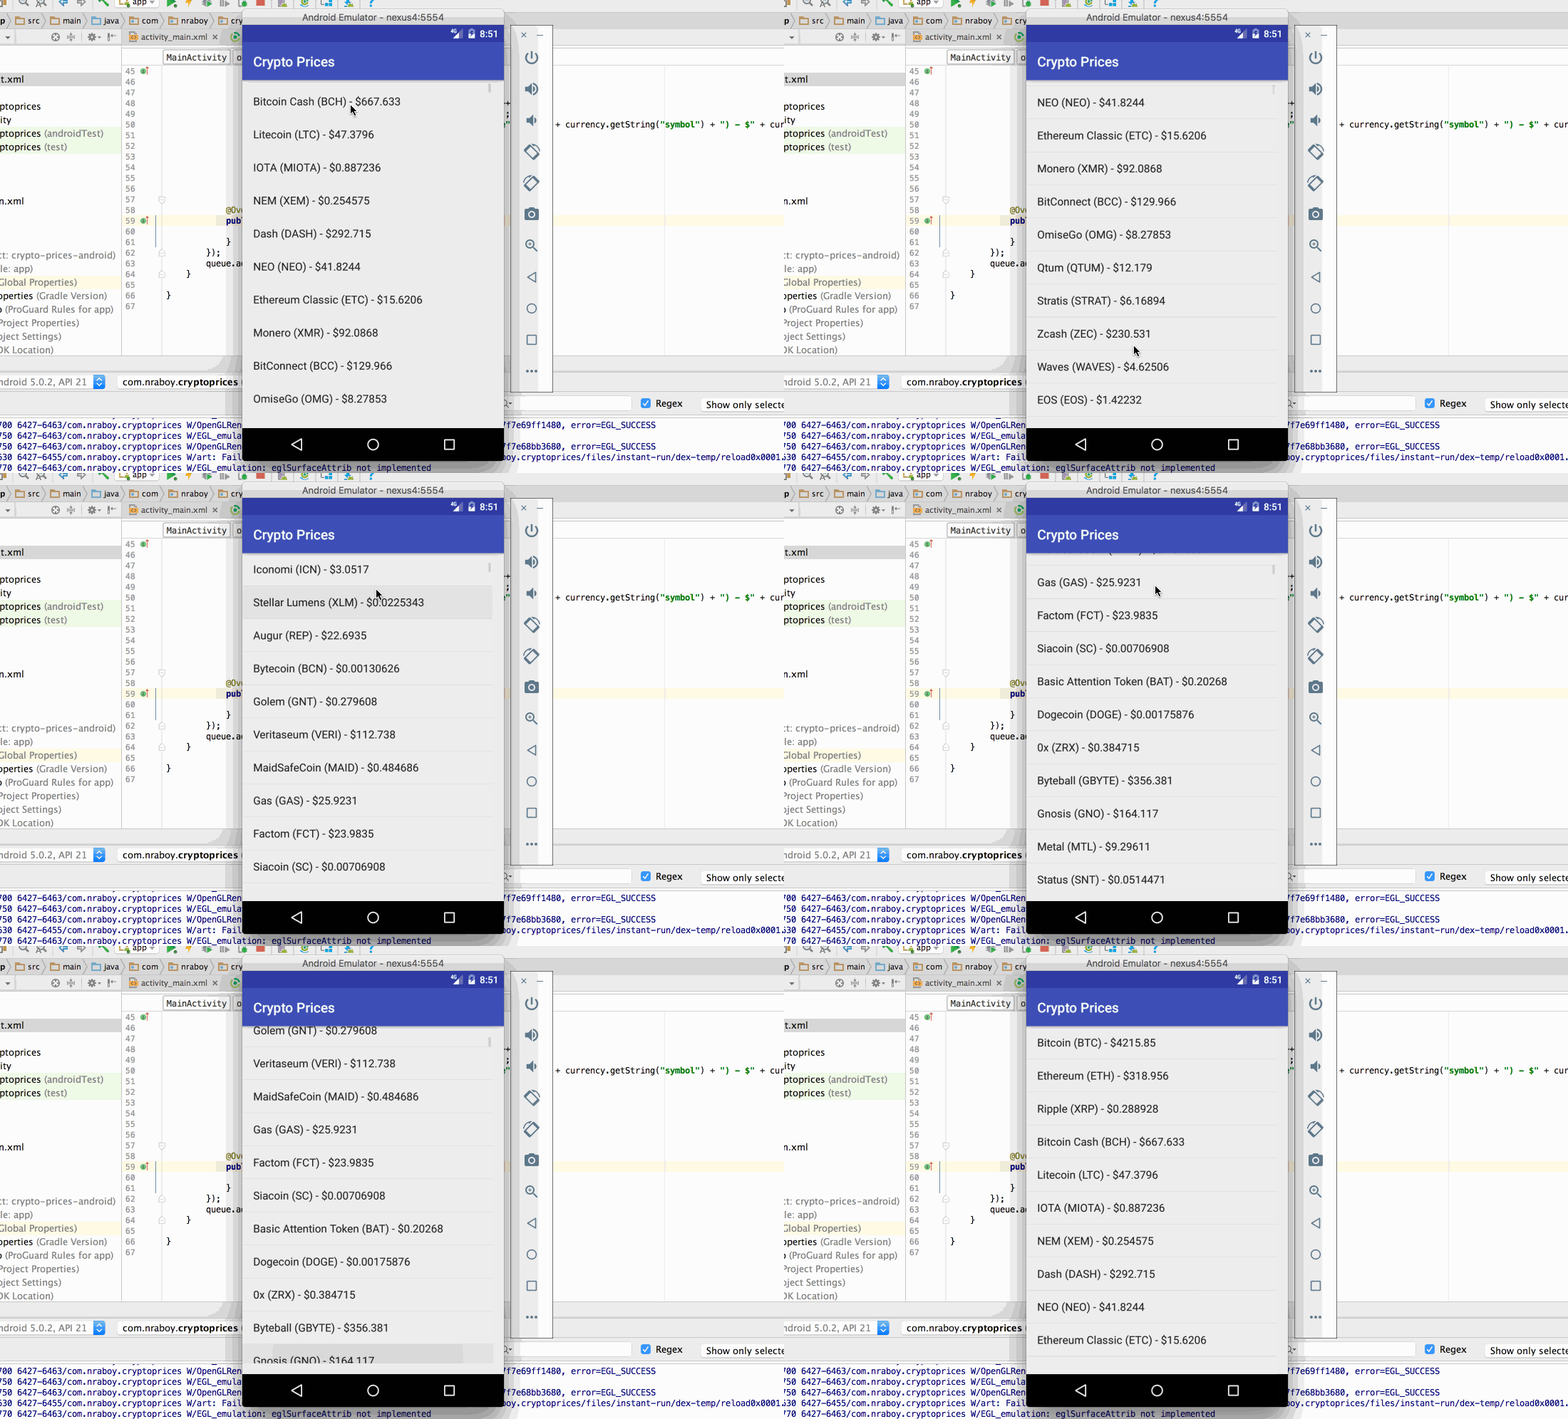
Based on the above image, we’re going to be creating an application that displays the current value of all the available crypto currencies. This data will be pulled from some remote API and displayed in a list.
Create a new Android project. Since the focus isn’t on learning Android, create the project however you prefer. This project should have at least one Activity class with an associated XML layout.
Before we write some code, we need to make sure that we’ve got the correct dependencies for Gradle and the correct permissions in our AndroidManifest.xml file.
Open the project’s build.gradle file and include the Volley dependency:
dependencies {
      ...
      compile 'com.android.volley:volley:1.0.0'
  }
Volley will be used to make requests against a remote API. For more information on Volley, check out the official documentation, or a previous blog post I had written.
Now open the project’s AndroidManifest.xml file and include the INTERNET permission:
<manifest>
       ...
      <uses-permission android:name="android.permission.INTERNET" />
      <application>
      ...
</manifest>
The INTERNET permission will allow us to communicate to remote resources outside the application.
With the project setup out of the way, let’s focus on the development of our single page Android application. Start by opening the project Java class for your Activity. In my case, mine is called MainActivity.java and the contents look like this:
package com.nraboy.cryptoprices;
import android.support.v7.app.AppCompatActivity;
import android.os.Bundle;
import android.util.Log;
import android.widget.ArrayAdapter;
import android.widget.ListView;

import com.android.volley.Request;
import com.android.volley.RequestQueue;
import com.android.volley.Response;
import com.android.volley.VolleyError;
import com.android.volley.toolbox.JsonArrayRequest;
import com.android.volley.toolbox.Volley;

import org.json.JSONArray;
import org.json.JSONException;
import org.json.JSONObject;

import java.util.ArrayList;

public class MainActivity extends AppCompatActivity {
    public ArrayList<String> cryptos = new ArrayList<String>();
    public ArrayAdapter adapter;

    @Override
    protected void onCreate(Bundle savedInstanceState) {
        super.onCreate(savedInstanceState);
        setContentView(R.layout.activity_main);
        final ListView listview = (ListView) findViewById(R.id.cryptosList);
        this.adapter = new ArrayAdapter(this,
                android.R.layout.simple_list_item_1, cryptos);
        listview.setAdapter(adapter);
    }

    @Override
    protected void onStart() {
        super.onStart();
        RequestQueue queue = Volley.newRequestQueue(this);
        String url ="https://api.coinmarketcap.com/v1/ticker/";
        JsonArrayRequest jsonRequest = new JsonArrayRequest(Request.Method.GET, url,
                new Response.Listener<JSONArray>() {
                    @Override
                    public void onResponse(JSONArray response) {
                        try {
                            JSONObject currency;
                            for(int i = 0; i < response.length(); i++) {
                                currency = response.getJSONObject(i);
                                cryptos.add(currency.getString("name") + " (" + curr
                            }
                            adapter.notifyDataSetChanged();
                        } catch (JSONException error) {
                            Log.d("POLYGLOT", error.getMessage());
                        }
                    }
                }, new Response.ErrorListener() {
            @Override
            public void onErrorResponse(VolleyError error) {
                Log.d("POLYGLOT", error.getMessage());
            }
        });
        queue.add(jsonRequest);
    }
}
There is a lot happening in our Java code, so let’s break it down. Within our MainActivity class we have the following variables:
public ArrayList<String> cryptos = new ArrayList<String>();
public ArrayAdapter adapter;
The cryptos variable will hold some of the parsed data that we consume from our remote API. The adapter variable will give us control of our ListView. Next we have the onCreate method which is the first method to be run when the application is launched:
@Override
protected void onCreate(Bundle savedInstanceState) {
    super.onCreate(savedInstanceState);
    setContentView(R.layout.activity_main);
    final ListView listview = (ListView) findViewById(R.id.cryptosList);
    this.adapter = new ArrayAdapter(this,
    android.R.layout.simple_list_item_1, cryptos);
    listview.setAdapter(adapter);
}
The ListView that we’ll soon create in our XML will be referenced in the Java code and the cryptos variable is assigned to it as a source of data.
The onStart method that is called after the onCreate method is where the magic happens:
@Override
protected void onStart() {
    super.onStart();
    RequestQueue queue = Volley.newRequestQueue(this);
    String url ="https://api.coinmarketcap.com/v1/ticker/";
    JsonArrayRequest jsonRequest = new JsonArrayRequest(Request.Method.GET, url, nul
            new Response.Listener<JSONArray>() {
                @Override
                public void onResponse(JSONArray response) {
                    try {
                        JSONObject currency;
                        for(int i = 0; i < response.length(); i++) {
                            currency = response.getJSONObject(i);
                            cryptos.add(currency.getString("name") + " (" + currency
                        }
                        adapter.notifyDataSetChanged();
                    } catch (JSONException error) {
                        Log.d("POLYGLOT", error.getMessage());
                    }
                }
            }, new Response.ErrorListener() {
        @Override
        public void onErrorResponse(VolleyError error) {
            Log.d("POLYGLOT", error.getMessage());
        }
    });
    queue.add(jsonRequest);
}
Using Volley, we can issue an HTTP request to the free and open Coin Market Cap API. The response will be a JSONArray which we loop over and add our desired content into the cryptos variable.
In our example, we’re adding the cryptocurrency name, symbol, and price in USD to the list. After the cryptos variable changes, we need to update the ListView via the notifyDataSetChanged() method.
The XML that powers this Java logic is seen below:
<?xml version="1.0" encoding="utf-8"?>
<android.support.constraint.ConstraintLayout xmlns:android="http://schemas.android.com/apk/res/android"
    xmlns:app="http://schemas.android.com/apk/res-auto"
    xmlns:tools="http://schemas.android.com/tools"
    android:layout_width="match_parent"
    android:layout_height="match_parent"
    tools:context="com.nraboy.cryptoprices.MainActivity">

    <ListView
        android:id="@+id/cryptosList"
        android:layout_width="368dp"
        android:layout_height="495dp"
        tools:layout_editor_absoluteX="8dp"
        tools:layout_editor_absoluteY="8dp" />
</android.support.constraint.ConstraintLayout>
By using Volley we were able to populate our list with cryptocurrency data obtained from some third-party resource. While not terribly complicated, it can easily become exhausting when building a full scale application.
Now we can focus on the NativeScript alternative that has cross-platform support with significantly less complexity.
Going Cross Platform and Native with NativeScript / Angular
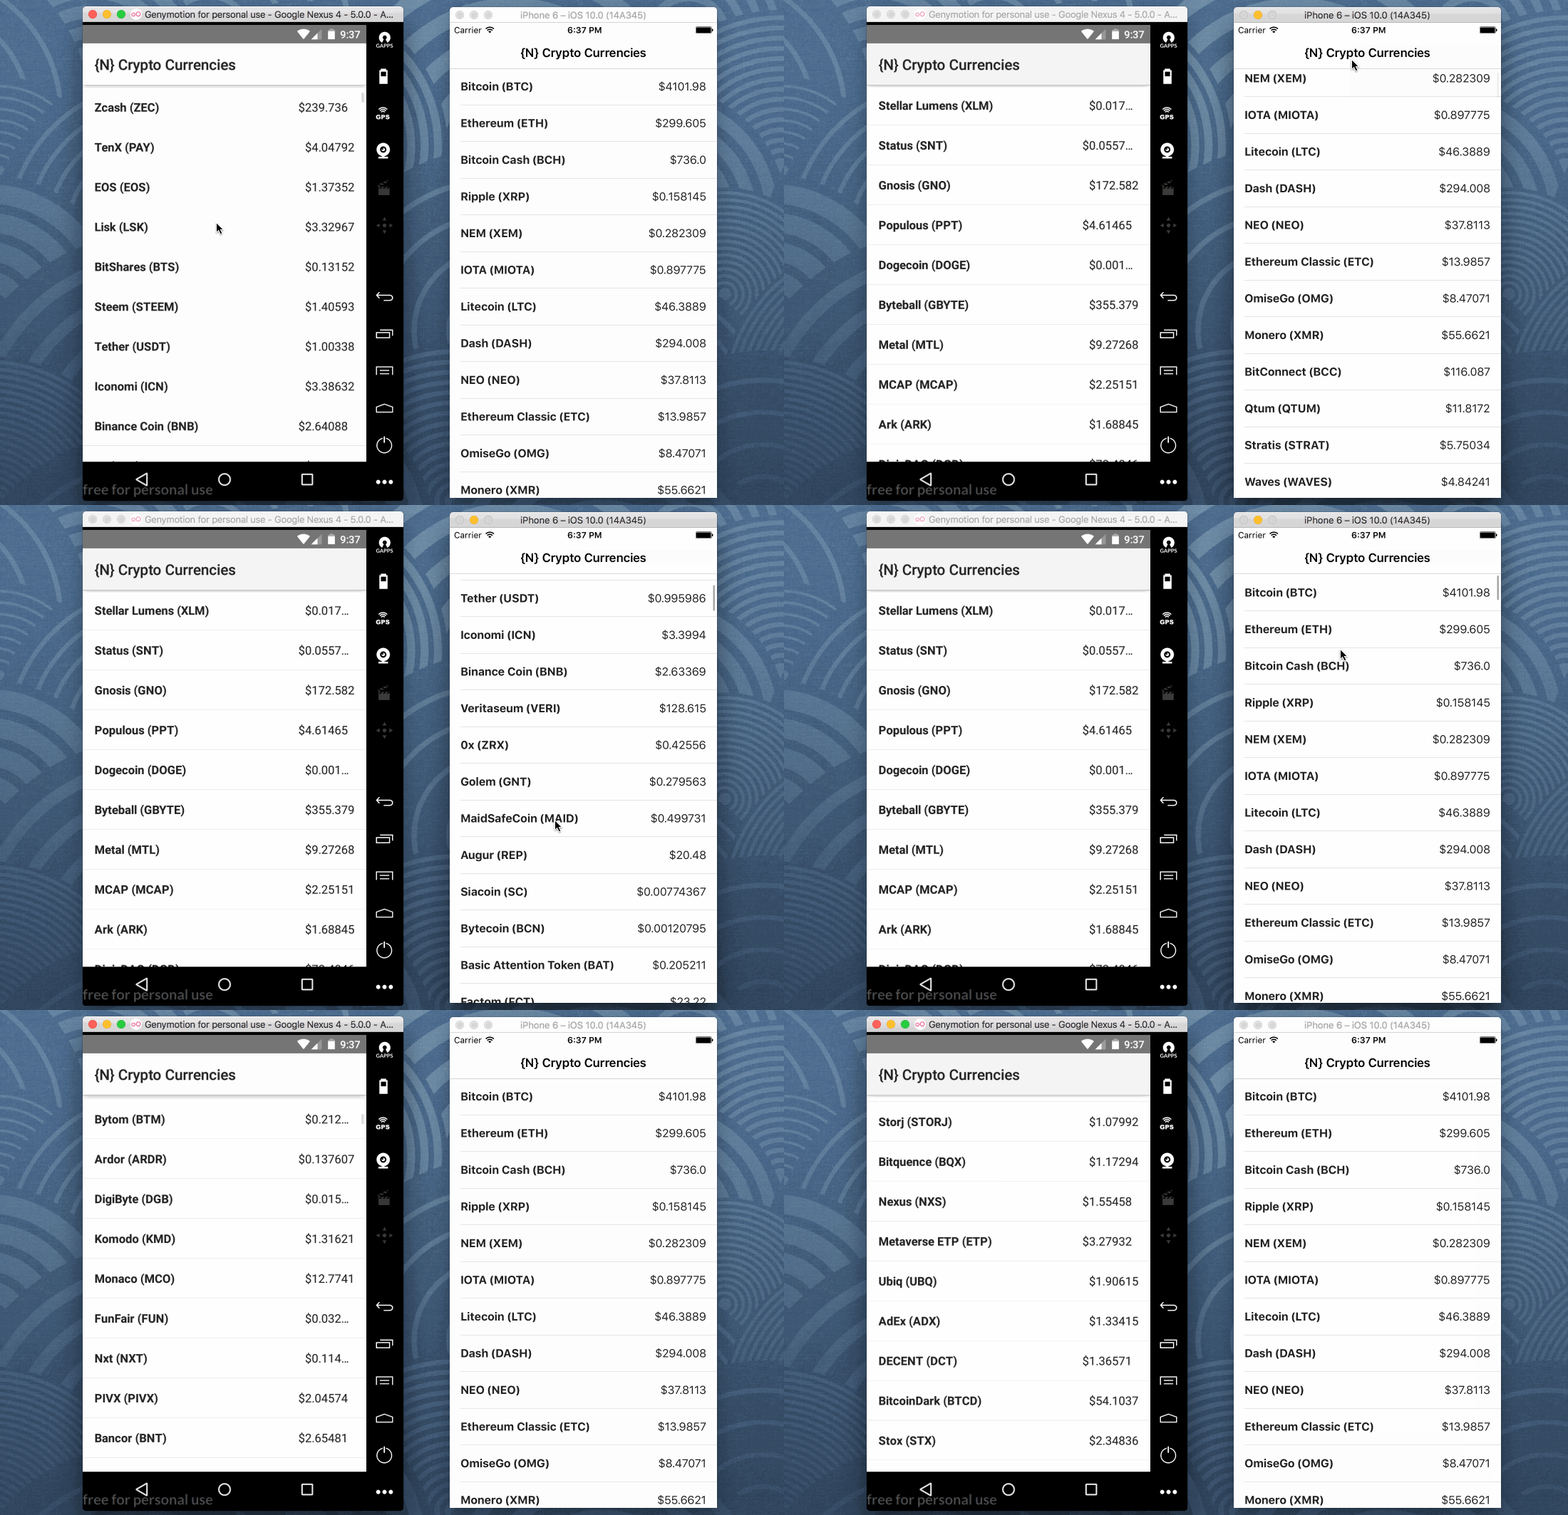
Like with the previous Android with Java example, we’re going to be creating a NativeScript application that displays cryptocurrency data obtained from a third-party.

In the above image, you can see that the styles are a little different between the Android with Java version and the NativeScript version. This is because I used the default styles for both development methods. They can easily be formatted to match.
Assuming that you’ve installed the NativeScript CLI, execute the following command:
tns create ns-crypto-project --ng
In the above command, notice the use of the --ng flag. NativeScript supports several different frameworks sitting on top of it, so we’re indicating that we want to use Angular.
With the project created, we’re going to need to do some slight setup like we did with the Java alternative.
Open the project’s app/app.module.ts file and make it look like the following:
  import { NgModule, NO_ERRORS_SCHEMA } from "@angular/core";
  import { NativeScriptModule } from "nativescript-angular/nativescript.module";
  import { NativeScriptHttpModule } from "nativescript-angular/http";
  import { AppRoutingModule } from "./app.routing";
  import { AppComponent } from "./app.component";
  @NgModule({
      bootstrap: [
               AppComponent
      ],
      imports: [
          NativeScriptModule,
          NativeScriptHttpModule,
          AppRoutingModule
      ],
      declarations: [
          AppComponent,
      ],
      providers: [],
      schemas: [
          NO_ERRORS_SCHEMA
      ]
  })
  export class AppModule { }
Because we plan to make HTTP requests, we’ve imported the NativeScriptHttpModule and added it to the imports section of the @NgModule block. We’ve also stripped out some component declarations that we won’t be using.
The next step is to remove those same component declarations from our list of navigation routes. Open the project’s app/app.routing.ts file and make it look like the following:
  import { NgModule } from "@angular/core";
  import { NativeScriptRouterModule } from "nativescript-angular/router";
  import { Routes } from "@angular/router";
  const routes: Routes = [];
  @NgModule({
      imports: [NativeScriptRouterModule.forRoot(routes)],
      exports: [NativeScriptRouterModule]
  })
  export class AppRoutingModule { }
The routes array is now empty. Remember, this is going to be a single page application and all we’ve done is remove reference to the pages that come with the default project template.
With the configuration out of the way, we can focus on the development of the application. When developing Android applications with Java you typically have an XML file for every Java class. The same concept applies to NativeScript.
Open the project’s app/app.component.ts file and include the following TypeScript:
import { Component, OnInit } from "@angular/core";
import { Http } from "@angular/http";
import "rxjs/Rx";

@Component({
    selector: "ns-app",
    templateUrl: "app.component.html",
})
export class AppComponent implements OnInit {

    public currencies: Array<any>;

    public constructor(private http: Http) {
        this.currencies = [];
    }

    public ngOnInit() {
        this.http.get("https://api.coinmarketcap.com/v1/ticker/")
            .map(result => result.json())
            .subscribe(result => {
                this.currencies = result;
            });
    }

}
In the above code we have a public variable called currencies. This variable will hold the response we receive from the third-party API. Because it is public, it will be accessible from the XML. Within the constructor method we initialize this variable.
The real magic happens in the ngOnInit which is similar to the onStart that we saw with Java.
public ngOnInit() {
    this.http.get("https://api.coinmarketcap.com/v1/ticker/")
        .map(result => result.json())
        .subscribe(result => {
            this.currencies = result;
        });
}
The ngOnInit is called after the constructor method. Using the Http service that we had imported, we can issue a request. Angular relies heavily on RxJS when working with asynchronous data. RxJava, which uses the same API as RxJS, is available in Java, however Volley did not use it.
With RxJS, we’re taking the response of the request, transforming it into JSON, and subscribing to the result so it can be used. In this case we’re applying the result to our public variable.
Open the project’s app/app.component.xml file so we can take a look at the UI:
<ActionBar title="{N} Crypto Currencies"></ActionBar>
<GridLayout>
    <ListView [items]="currencies" class="list-group">
        <ng-template let-currency="item">
            <GridLayout rows="auto" columns="*, auto" class="list-group-item">
                <Label text="{{ currency.name }} ({{ currency.symbol }})" class="font-weight-bold" row="0" col="0"></Label>
                <Label text="${{ currency.price_usd }}" row="0" col="1"></Label>
            </GridLayout>
        </ng-template>
    </ListView>
</GridLayout>
Like with Android, we have our own flavor of XML markup in NativeScript. In the above UI we’ve defined an action bar, sometimes called a navigation bar, and a list. The ListView will loop through our currencies array found in the TypeScript and display them within a two column grid for each row.
This was significantly easier than the Java alternative, right? Imagine scaling this application. It won’t be any more difficult or time consuming.
Conclusion
You just learned why NativeScript is a logical next step for mobile application developers. Coming from an Android with Java background myself, being able to develop applications for both Android and iOS with significantly less code is a huge win. This is also noting that you’re still left with a native application with native performance in the end.
Not quite ready to make the full transition into NativeScript? You can actually merge the two technologies where half your application is Java and half your application is NativeScript. I wrote an example on doing this in a previous blog article titled, Extend Legacy Java Android Applications with NativeScript and Angular.
Need help building out your next cross-platform project? Convective is a NativeScript Preferred Partner and a Progress Service Delivery Partner. Find out more.

